Hewlett Packard is one of the leading and renowned names in the world of printers.…
What to do if HP Printer not Connecting to Laptop or WiFi?
Hewlett Packard or popularly referred to as HP Printers is globally known for offering incredible services and products. In fact, the best thing about using HP Printers is the fact that it offers some of the quality printouts. However, at times, one might face a few of the connection problems. So, just in case, if your HP printer is unable to print and display connection problems, it can be due to a variety of reasons. Read this blog to learn the reasons behind your HP Printer not connecting to PC or Laptop successfully and the steps to take to ensure proper connection on your laptop or to your Wi-Fi network.
Why is my HP printer not connecting to my computer?
Your ‘HP printer not connecting to computer or WiFi’ is caused due to lose connection, problems in the printer software, faulty USBs, and more. An unsuccessful connection of your HP printer to WiFi can also occur due to poor connection, issues in the network, unstable internet, etc. You also need to make sure that your printer has the latest and updated driver installed; otherwise it will not function as intended.
How to fix if HP Printer not connecting to a computer?
Connecting your HP printer to your computer can often be challenging due to the complexities involved. Follow the steps below to connect the HP printer to your computer successfully:
There are two ways with which you can connect your printer to your computer if your HP wireless printer not connecting to the computer –
Method 1: Connecting HP Printer using a USB cable
- Click on the Windows icon on your computer and Go to the start menu.
- Click on the gear icon and go to the settings window.
- After entering the settings page, click on devices.
- Click on the printers and scanners option on the device window.
- Select the add printer or scanner option.
- After selecting the ad printer or scanner, the computer will begin to detect your printer connected to it via USB.
- Once you see your printer model name pop-up, tap on it and complete the installation by following the on-screen prompts.
- Your connection is complete.
Method 2: Connecting HP Printer using a wireless network
- Turn on your printer and connect your printer to your Wi-Fi network.
- To connect your HP printer, click on the wireless icon on your printer screen.
- After clicking on the wireless icon, go to the wireless LAN settings.
- Try locating your home network, also known as SSID, by clicking on the Wi-Fi icon on the bottom right of the Control Panel.
- Once you’ve selected your desired network, enter your network password.
- Click on the Windows icon on your computer and Go to the start menu.
- Click on the gear icon and go to the settings window.
- After entering the settings page, click on devices.
- Click on the printers and scanners option on the device window.
- Select the add printer or scanner option.
- Once you see your printer model name pop-up, tap on it and complete the installation by following the on-screen prompts.
- Your connection is complete.
How to fix if HP Printer not connecting to laptop?
There is no need to worry about the HP printer not connecting to laptop device. Follow the steps given below for a successful connection of your HP printer with your laptop.
If your HP printer is not connecting to laptop:
Try fixing your printer connection issue:
- Switch off your HP printer and wait a few minutes, and then start to restart it if HP Printer not connecting to network on a laptop.
- Make sure that while connecting your printer to your laptop using a USB cable, the USB cable is not damaged and the connection is secure. Clean out the contents of the USB port to prevent any port-related problems while connecting to the USB.
- Ensure that you have a fast and strong internet connection while trying to connect your printer to your laptop wirelessly.
Try fixing your printer driver issue:
Many times, due to the printer driver being outdated, a printer’s functionality can be affected. Always make sure to download the latest and updated printer driver software. You can download the printer driver through 2 methods, i.e., automatically or manually.
To update your printer driver automatically, follow these steps:
- Make sure that your computer driver is set for automatically downloading the latest software.
- If not, then go to the device installation
- Then go to device installation settings and select Yes
- Finally, click on save changes to ensure automatic driver download.
To manually update your printer driver, follow these steps:
- Identify your printer is model name and number.
- Go to the official HP website and click on support and driver.
- Choose the download driver and software option and enter your printer’s name and number.
- Select the go button.
- Choose the version of your operating system and download the latest driver.
- Once the download is complete, run the installer to complete the process.
Try troubleshooting your printer:
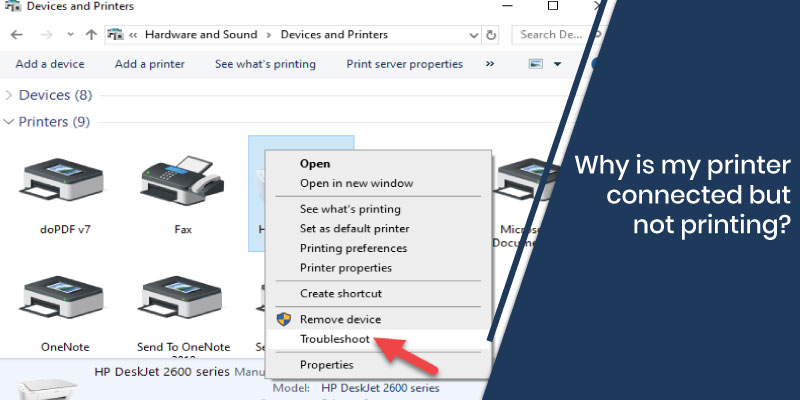
- You can use the troubleshooting and diagnostic tools to assess the problems with your printer. To begin troubleshooting, follow these steps given below:
- Go to the Control Panel on your computer.
- Select tools and printers.
- Identify and verify your printer and right-click on it.
- After Right-clicking, select troubleshoot.
- Follow on-screen instructions and fix the connection.
- Your troubleshooting is complete.
Try restarting the Printers Spooler service.
The printer spooler service of your HP printer performs the prints pool jobs and handles all the interactions with the printer. If your printer spooler service is not working, you will be unable to detect your printer, and you will not be able to successfully connected HP printer. Follow the steps below to restart your printer spooler service:
- Go to the Windows icon on the bottom left of your computer.
- Type MSC and click on Ok.
- Scroll down and search the printer service spooler option.
- If it is indicated that the services are running right, click on the service.
- Select stop.
- Right-click on the service again and click on start to restart the service.
- Restart your computer and check again if your printer is connected.
What to do if HP Printer not connecting to WiFi?
It is quite common for an offline error or connection issue to occur. Follow the steps given below in order to fix the issue of your HP Printer not connecting to WiFi.
Try restarting your computer:
Restarting your computers will allow you to resolve the issues of the HP printer not connecting to the Wi-Fi. Turn off your HP printer and your router and restart it to begin the connection process again.
Check the internet connection:
Make sure to check if your HP printer is connected to the network. You can also print a wireless network test report by going to the Control Panel on your HP printer screen and fix the issue of your HP printer not connecting to Wi-Fi. You can visit the wireless settings by clicking on the Wi-Fi icon on your printer.
Installing the latest printer driver software
You need to ensure that while trying to connect your HP printer to your wireless network that you have downloaded the latest and updated printer driver software. If not, you can go to the HP website, enter your printer model number and name, find the latest printer driver software compatible with your operating system, and begin the download.
Check your internet connection.
Make sure that your internet is working properly and that you have a fast and secure internet connection to ensure a successful wireless connection.
Related Stories to Read :
How to Connect HP Printer to Wifi
HP Scanner not working issue
Related Posts
Subscribe
0 Comments