Hewlett Packard is one of the leading and renowned names in the world of printers.…

How to Print Stickers on a Printer
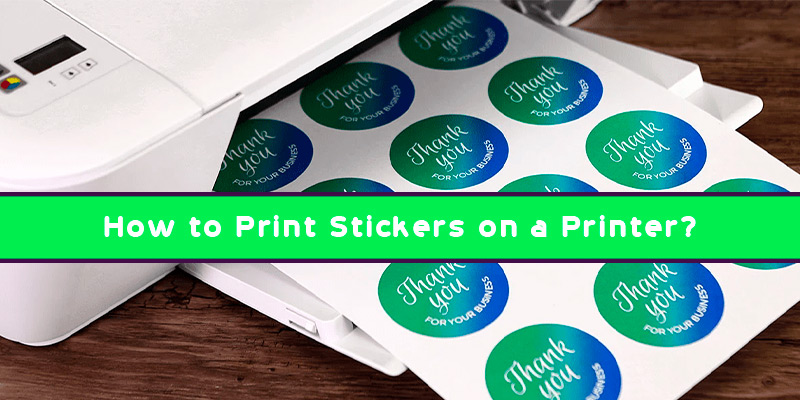
Printing stickers on your own at home saves cost and time. There are multiple advantages if you know how to print stickers at home on your own. Here we have listed some of those advantages. You can handle the quality of the stickers according to your wish and convenience if you know how to print your own stickers.
Steps to print stickers at home:
The primary step is to buy sticker paper or vinyl of good quality. Try to depend on renowned paper companies while you are buying a paper lot. You can get reliable quality sticker paper on online shopping sites or office supply stores near you. The sticker sheets are usually letter-sized and come in a pack of 50. You can opt for pre-cut labels or whole sheets of paper. For assistance regarding choosing the paper company, you can consult online websites or even the shopkeeper from whom you are purchasing this lot.
In case you are using pre-cut stickers, you are open to a lot of options-round labels. Oval labels, square labels, and rectangular labels. These labels are pre-made for all sorts of merchandise. If you want to shape it on your own you can use the Cricut machine. WE have mentioned the steps to how to print stickers on Cricut:
- Create your image file.
- Upload the respective sticker image to the Cricut design space. Go to the Upload option, find your sticker file, and click on the Upload image option. Select the Complex image type on the prompt page and then choose the ‘Save as a Print then Cut Image’ option. Finally, click on Insert Image.
- Print the sticker page from your respective printer.
- Set the material type as sticker paper.
- Load the mat and press the arrow button to load the mat into the Cricut machine.
- Finally, cut the stickers just by pressing the C button on your keyboard.
- You can unload the mat and get your stickers.
- The next step to creating a sticker is to use your innovation and creativity to design the sticker on a preferable app. You can design your sticker on any photo-editing application or a word processor such as Microsoft Word and even Microsoft PowerPoint that allows you to add text and images. It is convenient to set the document size to standard letter size. In case you want to print multiple stickers, it is wise to arrange your designed stickers on the chosen page for printout. This helps you utilize the most of a paper and also saves paper costs. The only thing to keep in mind while arranging your stickers on a single page is to ensure you keep enough space between each of them. For ease of your work, you can also use sticker templates that are available online.
- Inkjet printers are sensitive to the heavy use of colors. The printer starts malfunctioning if there is a problem with the printer’s ink supply. If you are using a particular color to print stickers at home, make sure you do not run out of that ink.
- The next step is to insert the sheet into the printer. Try to use a single-page feeder or place a single sheet in the regular feeder. AS the sticker paper is thicker than the regular sheets, it has a possibility of getting stuck in the printer. While feeding the printer with paper, you should ensure that it is devoid of any wrinkles or bends.
- Once the printer does its job, simply take out the paper without touching any colored part. Place it on a flat surface and let it dry. Just keep in mind that stickers use a greater concentration of ink than regular documents. So let them dry for a greater time than regular printouts.
- The final step is to cut the stickers from the sheets using a paper cutter. To paste the sticker somewhere, simply peel it from the corner.
How to print stickers on HP printer:
HP printers are some of the most popular printers used at home and office. They provide a wide range and variety of Inkjet printers that are perfect if you know how to print stickers on printer.
- Power on your HP printer and remove all the regular papers from the printer feeder.
- Check the sticker paper and ensure there is no damage.
- Bring out the printing tray and slide the paper width guide to the left of the tray.
- Load a single sheet into the printer with the sticker side facing down.
- Align the edges of the sticker paper with the help of paper guides on side of the tray.
- Go to your label creation software. Load the stickers are select the File option. Go to the Print option and the printer references tab opens.
- Select the ‘Plain’ or ‘Automatic’ as your paper type and adjust the paper size to match the size of your stickers.
- Make changes to the print quality as per your needs. Finally, press ‘OK’ and select the’ Print’ option to get your job done.
Follow the above-mentioned hacks and methods if you want to know how to print on sticker paper. The process is quite simple to grasp and use.
Related Stories to Read :
Subscribe
0 Comments


